Introduction
I ran across a question where someone was asking how to extract Microsoft Sentinel automation rules. I had thought the functionality was already in the automation rules, but I was wrong. There is the functionality for analytic rules, but it is not yet there for automation rules.
I had some simple PowerShell scripts that I had written to do this myself, so this post will discuss how they work. I have two different ones created and saved in my GitHub repository here: garybushey/MicrosoftSentinelAutomation: A couple of PowerShell scripts to extract MS Sentinel automation rules (github.com)
- Export-AzSentinelAutomationRule- Exports one or more Automation rules from the specified workspace. If you specify the AutomationRuleId parameter, a single Automation rule is exported. If you do not specify the AutomationRuleId parameter, all the automation rules in the specified workspace will be exported. The filename is <displayName>.json
- Get-AzSentinelAutomationRule – Displays one or more automation rules. If you pass in the AutomationRuleId value, only that automation rule will be displayed. Otherwise, all the rules will be displayed. This is useful if you want to save the information to a different filename than what the “Export” commands use.
- Get-AzSentinelAutomationRuleIDs – Displays just the automation rule’s displayname and ids. Easy way to get a single ID.
Let’s take a quick peak at how each of these works
Export Automation Rule(s)
If you have been following this blog, you should already know the basics of how to make a Microsoft Sentinel REST API call. If not, refer back to Your first Azure Sentinel REST API call – Yet Another Security Blog (garybushey.com)
First, we need to setup all the variables we need to create the authorization header. Keep in mind, that this PowerShell script requires you to be logged into Azure and in the correct subscription already.
#Setup the Authentication header needed for the REST calls
$context = Get-AzContext
$profile = [Microsoft.Azure.Commands.Common.Authentication.Abstractions.AzureRmProfileProvider]::Instance.Profile
$profileClient = New-Object -TypeName Microsoft.Azure.Commands.ResourceManager.Common.RMProfileClient -ArgumentList ($profile)
$token = $profileClient.AcquireAccessToken($context.Subscription.TenantId)
$authHeader = @{
    'Content-Type'  = 'application/json'
    'Authorization' = 'Bearer ' + $token.AccessToken
}
You will need to get the correct subscription Id, which we can get from the Azure context
$SubscriptionId = (Get-AzContext).Subscription.IdThen create the URL to call and call it, passing in the authorization header. If the Automation rule id has been passed in, we will use that only show that single item
$url="https://management.azure.com/subscriptions/$($subscriptionId)/resourceGroups/$($resourceGroupName)/providers/Microsoft.OperationalInsights/workspaces/$($workspaceName)/providers/Microsoft.SecurityInsights/automationRules/$($rulename)?api-version=2021-10-01-preview"

$results = (Invoke-RestMethod -Method "Get" -Uri $url -Headers $authHeader )
This will return a single automation rule. We will then convert the output into JSON, get the display name for the filename, and then save everything.
$resultJson = ConvertTo-Json $results -depth 100
$resultDisplayName = $results.properties.displayName
$resultJson | Out-File ($resultDisplayName + ".json")
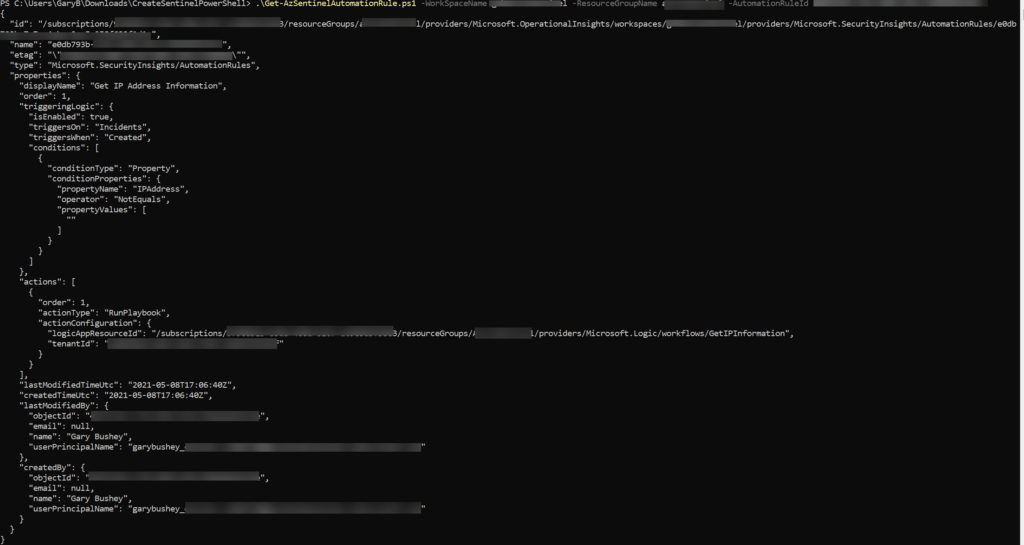
If you look at the file, the output will look similar to the image below.

If we have not passed in the Automation rule id, the URL we will be calling is slightly different as shown below
$url="https://management.azure.com/subscriptions/$($subscriptionId)/resourceGroups/$($resourceGroupName)/providers/Microsoft.OperationalInsights/workspaces/$($workspaceName)/providers/Microsoft.SecurityInsights/automationRules/?api-version=2021-10-01-preview"
$results = (Invoke-RestMethod -Method "Get" -Uri $url -Headers $authHeader ).value
If you look at the end of the URL, right before the “api-version”, you will see that there is no automation rule passed in. This will get us a listing of all the automation rules (pretty much all the MS Sentinel REST APIs work this same way).
You may have also noticed that we are looking at the “value” of the information being returned. This is because if there is more than one value being returned, it is returned as an array with “value” as the main object.
Then, once we get the results, we need to iterate through them and save each one separately.
foreach ($result in $results) {
    $resultJson = ConvertTo-Json $result -depth 100
    $resultDisplayName = $result.properties.displayName
    $resultJson | Out-File ($resultDisplayName +".json")
}
Not all that different from getting a single rule.
Showing the automation rules
I have two different ones here. One will show everything, and the second one just shows the Automation rule’s displayName and Id. Useful if you just need the Id for other calls.
Really, the only difference between these files and the ones we just looked at is we don’t write to a file. Rather than setting the “$resultJson” variable and writing that to a file, we write directly to the screen
ConvertTo-Json $results -depth 100Summary
That is all there is to it! Hopefully these files will help you until Microsoft Sentinel gets the functionality.